Showing posts with label Baby cards. Show all posts

Wednesday, September 12, 2018

Boutique - Card Kits in the Mail


Available NOW... I have designed a new Card Kit in the Mail that you can get for FREE!

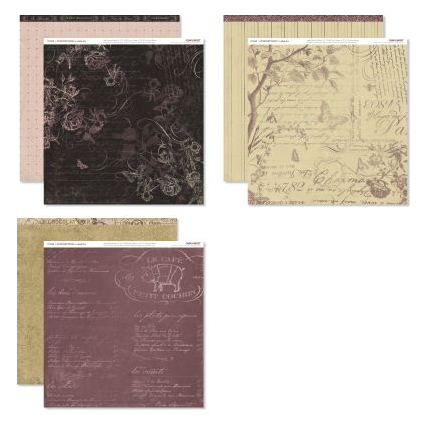
This one features the new Boutique papers and the Z4327 Baby Animal Doodles stamp & thin cuts set.


Additional items needed to create the cards as shown:
  • Z4237 Baby Animal Doodles Stamp & Thin Cuts set
  • Z314 Black & White Dots
  • Z24185 Intense Black Ink
  • Z6502 Peach Ink
  • Z2841 Glacier Ink
  • Z2060 Thin 3D Foam Tape


The bigger your order, the more you get FREE!


So... with a $60 order, you get my Boutique Card Kit for FREE.


With a $100 order, you get the Documented Card Kit, plus a Z4145 Light Grey Ribbon for FREE!


With a $150 order, you get my Boutique Card Kit, the Light Grey Ribbon, AND a A1225 I Kind of Like You stamp set for FREE!


AND, if you decide to add the September Stamp of the Month stamp set, Just Treats, to your order for just $6, you will also earn my Just Treats Card Kit for FREE! 


There is so much fun packed into these kits...

So what are you waiting for???


You can check out these and other fabulous CTMH products here:


Happy creating!  :)


Wednesday, July 19, 2017

Storybook Alphabet... July Stamp of the Month


Here is a sweet card for a baby boy that I made using the CTMH July Stamp of the Month, Storybook Alphabet.


I used Memento Tuxedo Black ink to stamp the alphas in, then coloured them in with Turquoise Blue, Pastel Green, and Leaf Green Twin Touch Shinhan Markers.


I also used one of the Hearts Thin Cuts dies to cut the heart shape, and added some stitching details with a journal pen.


Happy creating!  :)


Saturday, August 20, 2016

Baby Boy Card


I had a baby shower to go to last weekend.

Here is the card I made to go along with the gift.


(inspired by this card by Holly Stene)


I used the new CTMH Baby Bundle stamp set.

Colours used are Glacier, Peacock, White Daisy and Sweet Leaf.


Happy creating!  :)


Friday, February 13, 2015

It's A Girl! Shaped Card


I was recently asked to create a girly baby card.

So this is what I made, using this printable template I found on Pinterest.

It ended up being a little odd-sized (at approximately 4 1/2" by 5 1/4"), so I pulled out my envelope punch board and created a special sized envelope for the card.

Turned out pretty sweet.  ♥


Happy creating!  :)


Supplies used are all CTMH (unless otherwise noted):
Paper:  Chantilly - retired; White Daisy CS
Stamp:  Wild Wonders 
Ink:  Black
Embellishments:  White Shimmer Trim, Clear Sparkle, Summer Posies Just Blooms - retired, Pearls (Hero Arts)
Other:  Micro-tip scissors


Friday, August 8, 2014

I'm an Awesome Aunt!


Ok, ok, I mean Great Aunt, but I just like the sound of Awesome Aunt better!

My niece had a baby boy yesterday, which is the first grandchild of all of my siblings, so this is kinda a big deal.  ;)    And I can't believe my sister is a Grandma!!!

I just wish my mom were still here for this.  {sniff sniff}

Man, that would have been so great!


Anyways, I got inky today to make a card for the birthday boy.


I can't wait to smell, I mean hold the little guy.  


Happy creating!  :)


Supplies used (all CTMH unless otherwise noted):
Paper:  White Daisy, Ruby CS
Stamps:  Stitch Wonder, Hit the Spot - retired, Little Reminder - retired
Inks:  Glacier, Saddle
Embellishment:  Chocolate Polkadot Ribbon - retired
Other:  *Cricut Artbooking Cartridge - giraffe shape, Owl punch - heart shape (SU), 3D foam tape

*Note:  the giraffe shape was cut at 2 1/2" at real dial size.


Thursday, September 26, 2013

3 Babycakes Baby Layouts and Card... a Gift for a New Mom (of baby #2)


I created these layouts and card back in July or August.

I've been doing daycare for one little guy who is going to be becoming a big brother in October.

So I wanted to create a gift for his Mom for when the baby arrives.


Now, his Momma isn't a scrapbooker, so I wanted to create layouts that require minimal work on her end.
(I may have to trim some of her photos down to the correct size of the new baby for her layouts and glue them down for her.)

I also added some extra pages with slots for 4x6 and 6x4 photos at the back of her album, so she can easily add more photos to the album without having to do anything else.


The top two layouts were adapted from the Babycakes WOTG layout designs.
I just used the Babycakes My Compliments adhesive canvas pieces, and tweaked the originals a little.

The bottom layout is from the Make It From Your Heart Vol. 2 (if I remember correctly).
I saw this layout done by another fellow Consultant using these Babycake papers, and I thought I had written her name down.
But now it has been a few months, and I can't find who to give credit to.
If anyone knows, please let me know.


And lastly, here's the card I made, using some of the leftover pieces from the layouts.


I think it turned out pretty cute!
Although I had noticed that the framed portion is a little cock-eyed.
I've fixed that since I took this photo.  ;)


Until next time,

Happy creating!  :)


Wednesday, May 1, 2013

May Paper Trail Blog Hop... Later Sk8r


Welcome to the Paper Trail Blog Hop for May!

You should have arrived from Connie's blog, but this is a circular hop, so it doesn't matter where you begin. ;)


This month we are featuring the Later Sk8r Paper Packet.

And here is what I have to share with you.

Let me start with my layout.


For the layout design, I used Pattern #8 from the Make It From Your Heart Volume 1 booklet.

And I used the Later Sk8r My Stickease, and did a little stamping and embellishing to complete it.

Now I just need to add some photos to finish it off.


Here's another project, this time a shaped card.


Now, isn't this just the cutest card!?
There's just something so lovable about shaped cards.  ;)

I basically used a template by Deneen Treble, but I ended up not printing it out, but just eyeballed it to get it to look basically the same.
You can find Deneen's Little Boy Overalls template HERE.

I think this could be used for a little boy's birthday or even as a baby boy card.


These are what the Later Sk8r papers look like:


And with this being a new month, that also means that there is a new
Stamp of the Month:  Pinwheel


So that's it for me today, thanks so much for visiting.

Please continue along the Paper Trail Blog Hop by visiting Linda's blog.

Happy creating!  :)


Supplies used (all CTMH unless otherwise noted):

Adventure Time Layout:
Paper:  Later Sk8r B&Ts; Slate, White Daisy, Outdoor Denim CS
Stamp:  Later Sk8r WOTG set
Inks:  Slate, Pear, Lagoon
Embellishments:  Later Sk8r My Stickease, Later Sk8r Assortment, Green Epoxy Bubble, Outdoor Denim Button, White Embroidery Floss
Other:  Cricut Art Philosophy Cartridge, Make It From Your Heart - Pattern #8, Sponge, 3D Foam Tape, Micro-tip Scissors

Overalls Card:
Paper:  Later Sk8r B&Ts; White Daisy CS
Stamp:  Later Sk8r WOTG set
Inks:  Whisper, Outdoor Denim
Embellishments:  Whisper Buttons
Other:  3/4" Circle Punch (EK), 1 3/4" Circle Punch (EK), Black Journal Pen, Micro-tip Scissors, 3D Foam Tape, Ruler, Sponge


Tuesday, January 1, 2013

Paper Trail Blog Hop... La Belle Vie


Welcome to the Paper Trail Blog Hop for January!
 
You should have arrived from Amy's blog, but this is a circular hop, so it doesn't matter where you begin.  ;)
 
This month we are featuring the La Belle Vie paper packet.
 
 
I made a couple of cards for this month's hop.
 
 
First up is this "hello" card.


The little paper squares are cut to 1/2" x 1/2".


Idea credit for this one goes to the CTMH Art Department who created this amazing cover on a Canvas Journal.


And here's my second card.


This one is a 6x6 Kraft card to welcome a baby girl.
 
I stamped and clear embossed the owl with Black ink directly onto a piece of the light pink B&T paper.  Then I stamped and embossed it again onto a scrap piece of Colonial White cardstock, and then trimmed the eyes out with my scissors and pop-dotted them with 3D foam tape for added dimension.
 
The branch was cut using the Cricut Art Philosophy cartridge (cut at 2 3/4"), and the leaves were from the Cricut Artiste cartridge (cut at 1/2" and 1/4").
 
 
Here are what the papers from La Belle Vie look like:


And you might be wondering about the adorable owl I used on my card.
 
It is from the stamp set included in the Whooo's Your Valentine kit, available only until January 31st for just $10 with a minimum $35 order.
 
This is what the stamp set from the kit looks like:


Also, with a new month, there is a new Stamp of the Month available for January, for just $5 with a $50 minimum purchase.


Thanks for visiting me today.
 
Please continue along the Paper Trail Blog Hop by visiting Connie's blog.
 
 
Happy creating, and happy New Year!  :)


Supplies used (all CTMH unless otherwise noted):
 
Hello Card:
Paper:  La Belle Vie B&Ts; Colonial White CS
Stamp:  Cricut Artiste Word Balloons
Ink:  Black Pigment
Embellishments:  DE Quotes, Rosette Ribbon, Black sparkle
Other:  Cricut Artiste Cartridge, Clear Detail Embossing Powder, 3D foam tape, Micro-tip Scissors, ScorTape (ScorPal)
 
Owl Card:
Paper:  La Belle Vie B&Ts; Colonial White, Cocoa CS
Stamps:  Whooo's Your Valentine, Little Reminder - retired
Inks:  Black, Versamark
Embellishments:  Rosette Ribbon, Black Striped Grosgrain
Other:  6x6 Kraft card, Cricut Artiste cartridge, Cricut Art Philosophy cartridge, Clear Detail embossing powder, Micro-tip scissors, 3D foam tape, ScorTape (ScorPal), Velcro dot (Velcro)


Tuesday, May 22, 2012

Baby Cards... Boy and Girl


These are my latest cards available for purchase.  

When you purchase one of my cards, you get a choice of one of my box templates as a bonus.  ;)

Choice of baby boy or baby girl.


(inspiration for these cards came from this one by Charity Lindberg... click the link and then just scroll down to see hers)


Happy creating!  :)


Sunday, January 8, 2012

Baby Cards Boxed Set


I'm still waiting on my shipment of new goodies from the new Idea Book (and my new Spring/Summer Idea Books, too).

So that means it's the perfect time to play with my stash!

My son took over the TV room to play on his Xbox this morning to play Halo.  I really don't enjoy watching or listening to that, so I went into my scraproom and dug out some of my favourite old retired papers, Twitterpated, a new stamp set from the current Idea Book that I hadn't yet inked up, Zoology, and a set that is going to retire at the end of January, called Sweet Baby.  A much more enjoyable way to spend my time!!!

This is what I created:  a super cute boxed set of baby cards, 2 suitable for a girl and 2 for a boy. 


I'm thinking I should offer this as a class, but more customizable where my customers can pick any of my paper packs and stamps of their choice.  That way if they don't want to make baby cards, they can choose their own theme.  Sounds fun, right?  Of course they'd be stuck with all the cutting, but it seriously took me only about 2 hours (if that) to come up with this.  

It would also be a great way for me to use up some of my ever-growing stash.  Anyways, I'm rambling....  ;)


The A2 Slant Top Card Box may look familiar.  It's one of my templates you can get as a bonus with the purchase of one of my cards.  You can see the cards and all the templates I currently have available HERE.


I better get going... got to put away the Christmas tree today.


Happy creating!  :)


Supplies used (all CTMH unless otherwise noted):
Paper:  Twitterpated B&Ts - retired; Colonial White, Chocolate CS
Stamps:  Zoology, Sweet Baby - retiring at the end of January
Inks:  Chocolate, Sorbet, Heavenly Blue
Embellishments:  Sorbet ribbon, Chocolate polka dot organdy, Sweet Leaf button, Chocolate bigger brads
Punches:  Corner rounder, 2 1/2" scallop circle (Marvy Uchida), 2" circle (Fiskars), Scallop border (SU)
Other:  3D foam tape, ScorTape (ScorPal), Velcro Dot (Velcro)


Monday, March 21, 2011

Baby Boy card... an H2H Challenge


It's baby week over at the Heart 2 Heart Challenge Blog!

This is what I made for the challenge.  I think the longest amount of time I spent on this card was in looking for my Prisma colouring pencils that were packed away.  Of course they were in the last box I looked at.  {I've been busy packing, getting ready to move.}  Thankfully I had written down on the tops each box what is packed inside each one.

I had a lot of fun with this one!  I love the colour combo.  The bunny image is from the March SOTM Sensational Season.  It's full of adorable, Beatrix Potter type of images.  To colour the bunny, I used a combination of inks with my blender pen, and my Prisma colouring pencils with odourless mineral spirits and a blending stump.  I also random stamped the bunny image in Sunset ink onto the Sunset cardstock.

Happy creating!  :)


Supplies used (all CTMH unless otherwise noted):
Paper:  Colonial White, Sunset, Chocolate, Lagoon CS
Stamps:  Sensational Season, Party Pennants, Birthday Boy, Tag the Occasion, Universal Backgrounds, Hit the Spot
Inks/Pencils:  Brown Staz-On, Grey Wool, Chocolate, Lagoon, Sunset; Prisma Colouring Pencils
Embellishments:  Chocolate grosgrain, Wooden button, Carribean Twine (The Twinery), Paper Doily (Michaels)
Punches:  1 1/4" circle, 2 1/4" and 2 1/2" circle (EK Success), Scallop border (SU)
Other:  Blending pen, Odourless Mineral Spirits (Michaels), Blending stumps (Michaels), 3D foam tape

Tuesday, March 9, 2010

Heard the SWELL News...


A friend of mine (who will be turning 41 this summer) just started telling people she's 3 mos. preggo... Another friend of mine was the one who told me and after I stopped laughing so hard (ROTFLMAO), I was like, "SERIOUS???  OMG! Thank goodness it's not me!"   LOL
Sorry peeps, but I'm closer to the being-ready-to-be-a-Grandma stage than being-a-new-(again)-MOM stage...   Actually, I think I'm still in shock!


Anyways, I just HAD to make her a card and thought I'd share my creation... the button didn't photograph well, as it actually matches the blush colour.  TFL


Supplies used (all CTMH unless otherwise noted):
Paper: Blush, White Daisy CS
Font: CTMH Hippo
Chalk: Spring Soft Chalks
Embellishments: White Daisy floss, Light pink button (stash), White organdy (Walmart)
Tools: Micro-tip scissors, Cuttlebug, Sizzix Petals a Plenty embossing folder (SU), Sanding block
Adhesive: Tombo Mono Multi (LSS), 3D foam tape (other)

Thursday, February 25, 2010

Baby Boy Bear


Isn't he cute?  There's just something about teddy bears... 

As soon as I saw the wings on the Star Power stamp set, I knew they HAD to be paired with the retired Beary Much bear.  I like how this card turned out, but I'm thinking now that I should have used a more solid chocolate brown grosgrain ribbon.  Live and learn.  ;)

Supplies used (all CTMH unless otherwise noted):
Paper:  Kraft CS (SU), White Daisy, Crystal Blue CS
Stamps:  Miracle - retired, Star Power, Beary Much - retired
Inks:  Momento Tuxedo Black (Tsukeniko); Chocolate, Desert Sand, Bamboo; Copics: E47, E31, B02, G00
Dies/Embossing:  Top Note (SU), Sizzlits Lots of Tags (SU), Labels One (Spellbinders Nestabilities); Argyle embossing folder (Cuttlebug)
Embellishments:  Chocolate polka dot organdy, Black mini brads, Prisma Glitter
Tools:  Cuttlebug, Micro-tip scissors, Sponge Dauber
Adhesive:  Glue pen, Mono-multi (LSS), 3D foam tape (other)

Saturday, June 6, 2009

Baby shower gift (boxed set of thank you's)


Here's a project I started a while ago and just found the time this morning to finish. It's using my Double Scraplings idea for the thank you cards, and I created the little box to house them in. I've seen these boxes before and thought they're just so cute, but I had to create my own cutting guide to house my double scraplings. I have intentions of giving these to my friend who's having a baby boy in August, but knowing me, I'll make something else... lol

What I used (all CTMH unless otherwise noted):
Childhood stamp set
Say It In Style stamp set
Animal Cookies B&Ts
White Daisy and Dutch Blue CS
Black, Dutch Blue and Tulip inks
White Daisy ricrac
White Daisy brad
Just Blooms Summer Posies
CC metal charm

Friday, June 5, 2009

A Child Is card... (Mojo #89 sketch)


Well, it's that time again... Mojo time! This one's for Mojo Sketch #89.

What I used (all CTMH unless otherwise noted):
Childhood stamp set
Animal Cookies B&Ts
Tulip and White Daisy CS
Tulip and Chocolate inks
Wide White Daisy grosgrain (from CB Animal Cookies Collection)
White Daisy Mini Medleys crochet flower
Tulip brads, Tulip and Sunflower bigger brads
1 3/4" circle punch (EK Success)
Scallop circle and scallop rectangle (Nestabilites)
Cuttlebug embossing folder - Mesh (Provo Craft)
Pop-dots (other)

Sunday, May 17, 2009

It's Hip to be Square! {3 square cards}


I received the new CTMH Wishes card book and just had to re-create the first card in this amazing book that really stood out to me -- Enchanting Enclosure. I changed the color combo for a boy and changed the part that wraps around. I just made it to attach to the front and glued it down. I made the larger one 6x6 and the smaller one 5x5. I followed the tip on how to make the background paper by using the polka dot background stamp and clear embossing it. Then I sponged the ink (Heavely Blue and Chocolate) all over the card, making the white polka dots stand out. For the little 3x3 card, I used the Mini Combination pattern. For this one I used Crystal Blue ink over the embossed polka dots. I stamped the flowers from Thank You, then clear embossed them before stamping over the flowers again with Bamboo ink, offsetting it a little.

What I used (all CTMH unless otherwise noted):
Wishes
Argyle Backgrounds stamp set
Thank You stamp set
Sans Alpha lowercase stamp set
Solo B stamp set
Solo S stamp set
Notebook, Magic Moments and Silhouette B&Ts
Chocolate, White Daisy, Bamboo, Black, and Colonial White CS
Chocolate, Heavenly Blue, Crystal Blue, Bamboo and Black inks
Cricut (blue stars - George & Basic shapes, baby - Base Camp)
Star Punch Large - green stars (SU)
White Daisy ricrac
Chocolate polka dot organdy
DMC floss in brown and tan
Hodgepodge Color Ready alpha
Rhinestone CC frame
Scallop corner punch (EK Success)
Clear Embossing powder
Piercing tool
Needle
Scallop edge punch (SU)
Sponge

Sunday, May 3, 2009

I discovered a cool site... and made some fast and fun little cards, too!

My congrats to Faith (aka Markie's Mom) for having her cards published on the cover page of the May issue of Sheetload of Cards. Now because of this, Faith posted on her blog about it and that brought me to the Sheetload of Cards website. This is my fun new discovery! Isn't it great when you discover new stuff? And the great thing is that these downloads are free! How cool is that? Very! There is a spot on the main page where you can give a donation. It's nice to have that option. You can pay as you go, and as you can afford... brilliant! I used May's instructions to create 18 cards: 9 cards that are 4 1/4 x 4 1/4" square and 9 scraplings that are 4 1/4 x 1 1/4". You also have the option of making just one card, too. Here's a pic of a few of the cards I made... I finished my scraplings, but need to just complete the rest of the larger cards, which I think I'll do on my Monday craft day at my BFFs.


Now when I was making the scraplings, I was trying to think of what to use them for. I decided they would make cute bookmarks with magnets at the bottoms and the other thing I think I'll use them for is packing them into my son's school lunches when he's having a rough week at school, just as a little "love" note.


And then I got to thinking that if I don't cut my strip of left over scrap piece of cardstock (2 1/2 x 8 1/2") in half to make 2 scraplings, I could make a larger scrapling which would make a cute little gift card. This little cutie measures 2 1/2 x 4 1/4".


So then that got me to thinking that these would perfectly fit gift cards, so I created some gift card holders by adding a strip of cardstock inside (2 x 2 1/2"). I just scored the bottom strip at 1/2" and used double sided sticky tape to adhere it along the bottom. I just tucked in a Starbuck's card to show how it fits in there.


And then, of course you need an envelope so you don't lose the gift card somewhere in transport! So I drew up a template for the envelope to fit this little card. I really love to create! My husband just doesn't fully get it, but that's okay... :)


This is just another 4 1/4 x 4 1/4 card I made. Love this new CTMH line called Animal Cookies!

LinkWithin

Blog Widget by LinkWithin