Showing posts with label Instructions. Show all posts

Tuesday, December 7, 2021

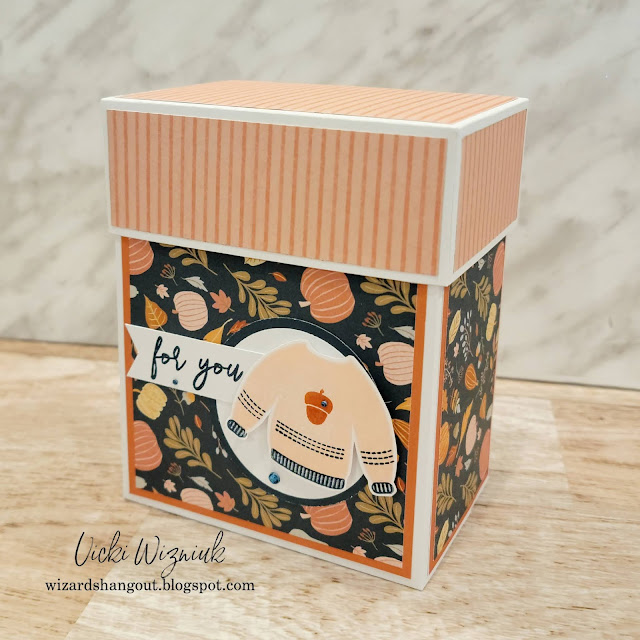
Large Card Box featuring Pumpkin Spice


After creating a wonderful set of 16 cards, I decided to pull out my Large Card Box tutorial and make a matching box to hold them.  

They all fit inside perfectly too, even along with their 16 envelopes.

Wouldn't it make a perfect last minute gift for someone?


If you are interested in getting my instructions for my Large Card Box Tutorial, you can send $4 CAD through PayPal (or eTransfer if you are in Canada) to me at vwizniuk@gmail.com, and I will email you the instructions.


Happy creating!


Pumpkin Spice Cards with Vicki's 2 Sheet Wonder


Hi everyone!

Hope you are well.


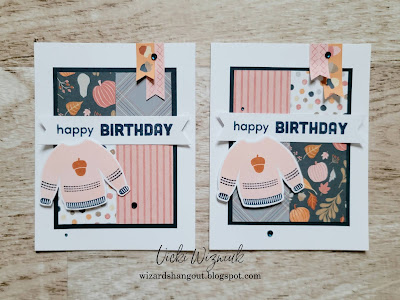
I'm back today to show you another sampling of fun cards I created with my NEW Two Sheet Wonder instructions, this time using papers from the very recent Pumpkin Spice paper pack.


Here's a better look at the cards...


The sweater stamp I used on my cards is from an old retired set called Ugly Sweater.  But there currently is a CTMH set that you can still get called Pumpkin Spice - Scrapbooking which even comes with matching dies.


The sentiments I used are all from one great set called For All Occassions.  A perfect addition to anyone's stamp collection.


I personally love how these cards turned out.  I hope you like them too.  ;)

If you wish to purchase a copy of my Two Sheet Wonder instructions, you can find the info here.


I also created a matching card box to hold all of these cards, using my Large Card Box Tutorial.  (I am going to create a seperate post showing it, so please look for that.)


Happy creating!


Thursday, December 2, 2021

Vicki's 2 Sheet Wonder

Hello everyone.

I am jumping on quickly to let you all know that my 2 Sheet Wonder cutting instructions are ready!

If you are interested in purchasing the instructions, you can send $4 CAD to me at vwizniuk@gmail.com and I will email the file to you.


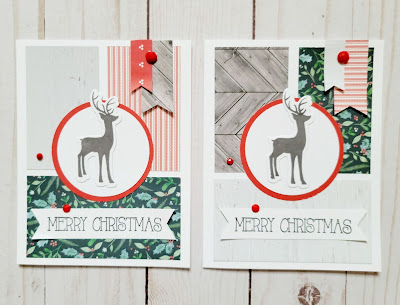
These are the 16 cards I created with my cutting instructions.  

Along with photos of the individual cards.


Thank you & love to all of you who have supported me and my business over the years.

Monday, March 18, 2019

Washi Tape Holder


It has been a while since I posted here, but I've been posting things over on my Facebook page.

So now it's time to play catch-up.  ;)


The original instructions for this Washi Tape Holder were done by Pootles.
You can find her video tutorial here.

I simply adjusted her measurements for my needs, and have my measurements in a photo below.

You can find sooooo many vidoes on YouTube done by Pootles. 
Luv her.  ♥


As my amount of rolls of Washi expands, I can easily add another holder.


Happy creating!  :)


Thursday, November 1, 2018

6x8 December Daily Mini Album - Wizard's Hangout Workshops


Some of you may have seen this on my Facebook page already.

I now have my 6x8 December Daily Mini Album Instructions ready to go!


This is a snapshot taken while I was still in the process of creating the album...


If you are interested in creating this album for yourself, or as a workshop with your own customers, you can get these instructions two different ways:

  1.  Free with a minimum $60 order from my CTMH website (if you live within Canada)
  2. Or for $15 CAD (Paypal to vwizniuk@gmail.com)


Supplies list:


X7239B ‘Tis the Season Paper Packet $14.25 CAD
X7239C ‘Tis the Season Complements - $9.75 CAD
Z4226 ‘Tis the Season Snowflakes - $8.50 CAD
Z4198 Gold Sequin Ribbon - $8.50 CAD
Z3090 Red Gems - $7.25 CAD
Z3252 6X8 Memory Protectors - $9.75 CAD
Z3192 4x6 Memory Protectors - $9.75 CAD
Z3191 3x4 Memory Protectors - $8.50 CAD
Z3235 4x4 Flip Flaps - $5.75 CAD
Z3230 3x4 Flip Flaps - $5.75 CAD
Z3234 3x3 Flip Flaps - $5.75 CAD
X6027 White Daisy Cardstock (12) - $7.75 CAD
X6028 Black Cardstock (12) - $13.00 CAD
X5992 Candy Apple Cardstock (12) - $13.00 CAD
X6009 Linen Cardstock (12) - $13.00 CAD
Z4159 Block Numbers Thin Cuts - $41.50 CAD
Z3386 Block Alphabet Thin Cuts - $91.00 CAD
Z4219 Black Everyday Life Album – 20.75 CAD
Z1151 3D Foam Tape - $8.50 CAD


Happy creating!  :)


Friday, August 18, 2017

Large Card Box


Hey, all!

I re-typed and re-vamped my instructions for my Large Card Box that I lost when I dropped my laptop about two years ago.

These new instructions include updated photos, and I also added cutting guides.


I was able to fit 18 cards and envelopes into the box shown below, but with less bulky cards, it could fit up to 24.


This would make a nice handmade gift to give someone, filled with Christmas, birthday, or all-occasion cards.


It holds standard A2 size cards:  4 1/4" x 5 1/2"


I sell my instructions for this card box for $4 through Paypal.

Payments can be sent to:  vwizniuk@gmail.com


Happy creating!  :)


Sunday, February 7, 2010

3x3 Thanks Card Tote (with instructions)


This morning I saw a cute little tote made to hold the little milk cartons that can be made with the Big Shot die, which is sold through SU.  I don't have the milk carton die, but I thought this tote could be really cute holding 3x3 cards instead.  I had to make some adjustments in the sizing of the milk carton tote so the cards wouldn't tip out, and this is what I came up with.  :)

Here's my instructions (altered from Ruth Norton's milk carton tote found HERE, shared on LeeAnn Greff's blog):
  • Start with 7" x 8 3/4" piece of CS.
  • With the 7" side at the top of your Scor-Pal, score at 1 3/4" and 5 1/4".
  • Turn so the 8 3/4" side is at the top of your Scor-Pal, and score at 1 3/4" and 3 1/2".   Then carefully score at 5 1/4", scoring only from the outer edge up to the intersecting 1 3/4" score line (see diagram).
  • Cut along all solid lines, making sure to trim off the lines I drew in blue which will help when folding up your box.  
  • Use a bone folder along all dashed score lines.
  • Fold Tabs A in and put glue on both tabs, then adhere to Tabs B one at a time.
  • Put glue on the outside of Tabs B, then adhere Tabs C to Tabs B one at a time.
  • Decorate the box as desired.


For the delicate flowers, I used the SU Fancy Flower punch with tissue paper.  To make quick work of it, I folded the tissue paper up, over and over until I had a good thickness, and then punched once for each flower on the cards.  For the front of the box, I just used a layer of 3 tissue flowers.  They are held together with a simple brad in the center and just scrunched up by hand.  Quick and easy, just the way I like it.  ;)

Supplies used (all CTMH unless otherwise noted):
Paper:  Black and White Daisy CS; Emporium CB and Grace B&Ts, White tissue paper
Stamps:  Thank You
Inks:  Black
Tools:  Paper piercer
Punches:  2 step bird, Scallop Trim border and corner, Fancy Flower, Key Tag, 1/2" circle (all SU)
Embellishments:  Black brads, Black floral grosgrain
Adhesive:  Tombo Mono Multi (LSS), 3D foam tape (dollar store), 1/2" Scor-Tape
Envelopes: from 3x3 12 card sets in the $1.50 bins at Michael's

Sunday, June 14, 2009

Treat Box (my new template)


Here's a sample of my latest and greatest! I created the template for this little 6x3.5x2.5" goodie bag yesterday and I'm loving it!

Since Dad's day is coming up next weekend, I thought this would be a good opportunity to make something for Dad (that would be my husband), to go along with his gift, which I'll post possibly later today.

I have a bunch of cellophane bags I purchased from CTMH a very long time ago (and I don't even know if they are still available anymore), but I do know that they are still available through SU, because I've seen them in their catalog.

I filled the cellophane bag with chocolate covered coffee beans I picked up while on vacation in Hawaii at the beginning of the year.

What I used (all CTMH unless otherwise noted):
World's Best Dad stamp set
Aspen B&T
Outdoor Denim and White Daisy CS
Acetate sheet
Cellophane bag
Twilight ink
Outdoor Denim grosgrain
Screw-head brads (other)
1 1/4" circle punch (EK Success)
Key Tag punch (SU)
Circle Coluzzle
Velcro dot (other)
Pop-dots (other)
And chocolate covered coffee beans

Envelope Template added (for the Double Scraplings)


Well, I just had to do it! I had to make an envelope template for my little Double Scraplings cards. This template is being added to the Double Scraplings Cards & Gift Box templates I have.

For everyone who had previously purchased my Double Scraplings Cards & Gift Box templates (before I found out that I couldn't sell my templates), please just email me at vwizniuk@pris.ca and I will be happy to forward the envelope template on to you. :)

Sunday, May 3, 2009

I discovered a cool site... and made some fast and fun little cards, too!

My congrats to Faith (aka Markie's Mom) for having her cards published on the cover page of the May issue of Sheetload of Cards. Now because of this, Faith posted on her blog about it and that brought me to the Sheetload of Cards website. This is my fun new discovery! Isn't it great when you discover new stuff? And the great thing is that these downloads are free! How cool is that? Very! There is a spot on the main page where you can give a donation. It's nice to have that option. You can pay as you go, and as you can afford... brilliant! I used May's instructions to create 18 cards: 9 cards that are 4 1/4 x 4 1/4" square and 9 scraplings that are 4 1/4 x 1 1/4". You also have the option of making just one card, too. Here's a pic of a few of the cards I made... I finished my scraplings, but need to just complete the rest of the larger cards, which I think I'll do on my Monday craft day at my BFFs.


Now when I was making the scraplings, I was trying to think of what to use them for. I decided they would make cute bookmarks with magnets at the bottoms and the other thing I think I'll use them for is packing them into my son's school lunches when he's having a rough week at school, just as a little "love" note.


And then I got to thinking that if I don't cut my strip of left over scrap piece of cardstock (2 1/2 x 8 1/2") in half to make 2 scraplings, I could make a larger scrapling which would make a cute little gift card. This little cutie measures 2 1/2 x 4 1/4".


So then that got me to thinking that these would perfectly fit gift cards, so I created some gift card holders by adding a strip of cardstock inside (2 x 2 1/2"). I just scored the bottom strip at 1/2" and used double sided sticky tape to adhere it along the bottom. I just tucked in a Starbuck's card to show how it fits in there.


And then, of course you need an envelope so you don't lose the gift card somewhere in transport! So I drew up a template for the envelope to fit this little card. I really love to create! My husband just doesn't fully get it, but that's okay... :)


This is just another 4 1/4 x 4 1/4 card I made. Love this new CTMH line called Animal Cookies!

Wednesday, February 18, 2009

Purse Card Holder


Yesterday morning I saw a "Purse card holder" on Jodi Collins blog (stampingalatte.blogspot.com) and just had to make one for myself. There were no instructions, so I just came up with my own template. I'm rather liking the simpler cards lately, too.

What I used:

Perfect Day B&T
Silhouette B&T
Black, Colonial White and Juniper CS
Black ink
Legendary Moments SS
Cupcake Sprinkles SS
Thoughtful Seasons SS
Just Blooms flower
Sparkles
Nestabilities Scalloped Oval die
Scallop edge punch (SU)
Grommets (sewing dept. at Walmart)
Black wide satin ribbon (Walmart)
Sentiment - Yummy SAB (SU)
Light blue dew drop (Michaels)

LinkWithin

Blog Widget by LinkWithin