Saturday, June 25, 2022

Two Sheet Wonder Cards

 I was playing with my Two Sheet Wonder again and created even more cards.

First one up is this cute cactus themed set.


And this masculine set, which turned out to be one of my faves.  Unfortunately, I don't seem to have taken any photos of the completed set, which I don't have anymore.  I have well over 300 cards for sale at a local store.  I'm happy to report that they are selling well.  


And lastly for now, a set of coffee cup themed cards.  For this one I used single sided sheets of patterned papers (usually I use double sided papers), so the end result was that it created 32 cards instead of 16.  It was a lot of cards in the end, but I love how they turned out so much!


This is seriously a wonderful Two Sheet Wonder.  

You can quickly create your own set of beautiful cards.


Here is a wonderful example.

Jayma Malme created this set of adorable cards using my Two Sheet Wonder.


Cute, right?

Please check her awesomeness out on Instagram.

https://www.instagram.com/jaymalew/


Well, that is all for today.

Happy creating!

Tuesday, December 7, 2021

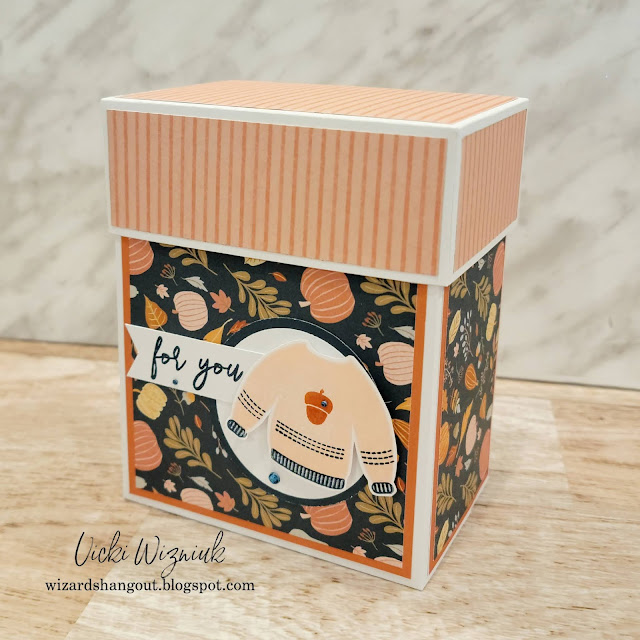
Large Card Box featuring Pumpkin Spice


After creating a wonderful set of 16 cards, I decided to pull out my Large Card Box tutorial and make a matching box to hold them.  

They all fit inside perfectly too, even along with their 16 envelopes.

Wouldn't it make a perfect last minute gift for someone?


If you are interested in getting my instructions for my Large Card Box Tutorial, you can send $4 CAD through PayPal (or eTransfer if you are in Canada) to me at vwizniuk@gmail.com, and I will email you the instructions.


Happy creating!


Pumpkin Spice Cards with Vicki's 2 Sheet Wonder


Hi everyone!

Hope you are well.


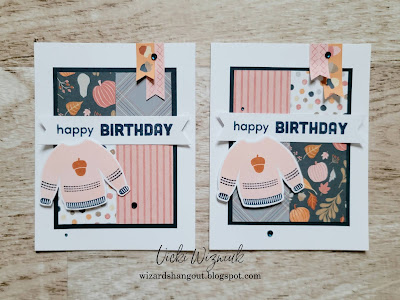
I'm back today to show you another sampling of fun cards I created with my NEW Two Sheet Wonder instructions, this time using papers from the very recent Pumpkin Spice paper pack.


Here's a better look at the cards...


The sweater stamp I used on my cards is from an old retired set called Ugly Sweater.  But there currently is a CTMH set that you can still get called Pumpkin Spice - Scrapbooking which even comes with matching dies.


The sentiments I used are all from one great set called For All Occassions.  A perfect addition to anyone's stamp collection.


I personally love how these cards turned out.  I hope you like them too.  ;)

If you wish to purchase a copy of my Two Sheet Wonder instructions, you can find the info here.


I also created a matching card box to hold all of these cards, using my Large Card Box Tutorial.  (I am going to create a seperate post showing it, so please look for that.)


Happy creating!


Thursday, December 2, 2021

Vicki's 2 Sheet Wonder

Hello everyone.

I am jumping on quickly to let you all know that my 2 Sheet Wonder cutting instructions are ready!

If you are interested in purchasing the instructions, you can send $4 CAD to me at vwizniuk@gmail.com and I will email the file to you.


These are the 16 cards I created with my cutting instructions.  

Along with photos of the individual cards.


Thank you & love to all of you who have supported me and my business over the years.

Wednesday, December 1, 2021

A NEW Cutting Template in the Works...


Hi all!

I've been working on a new cutting template using TWO 12x12 sheets of patterned papers to create 16 cards.


I will let you know when it is ready.

Let me know what you think.  :)


Wednesday, November 17, 2021

3 Different Pleated Cards

 Hello friends!  It feels so good to be back playing with my paper and inks, albeit these are all long retired now.

But still worthy of a share!  

Besides, I know you all have a huge stash of older papers and stamps like I do, unless you are just newly getting into papercrafts.

I used retired CTMH Jingle papers for these cards, and the sentiment came from a retired CTMH set called Just To Say.


I will share the sizing and scoring measurements for the patterned papers I used on my cards.

If you need more information on how to create one, you can easily search pleated cards on Pinterest.  There are lots of how-to videos on there.


This first card is a basic side pleated card.


(Please excuse my individual card photos, as it is dark out right now and I have no natural light to take photos, so I just cropped my original picture I took yesterday.)


NOTE:  when making these cards, it is easiest to adhere everything to
the card front before adhering the card front onto the card base.

Patterned paper:  4" x 9 7/8"

Score at:  1 1/2", 2 1/2", 4 1/2", 5 1/2", 7 1/2" and 8 1/2"

Measure up 1" from the bottom on the right side and mark with a pencil.

Cut from the 1" mark on an angle to the bottom of the farthest score line (the 1 1/2" score line).


My second card is a full pleated card.


Patterned paper:  3" x 11"

Score at:  1 1/2", 2", 3", 3 1/2", 4 1/2", 5", 6", 6 1/2", 7 1/2", 8", 9" and 9 1/2"

Measure up on both short sides and mark at 1 1/2" with a pencil.

Cut from the 1 1/2" mark (on the left) on an angle to the 5" score line.

Cut from the 1 1/2" mark (on the right) on an angle to the 6" score line.

After it is attached, trim off excess that hangs over sides.


My third card is a peek-a-boo pleated card.

You get to use some fun patterned papers underneath that peek out behind the pleated paper. 


Patterned paper:  3 1/2" x 8"

I didn't score this one the way I did the above cards.  There were no measurement instructions on the inspiration card I saw on Pintrest, only an image.  And on this one you will not be cutting an angle off.  So bear with me while I do my best to explain what I did for these folds.... lol

Using my fingers to pleat, I pleated at approx 1" in from the top right and 1 5/8" in from the bottom right. 

Then, again using my fingers, I pleated at 1 1/8" in from my first pleated line (at the top) and 1 1/2" in from the first pleated line (at the bottom).

I then used a bone folder to make my pleats nice and crisp.

Adhere this piece onto your 4" x 5 1/4" patterened paper, with the excess on the left side.  Trim excess off before adhering onto your card base.

Lastly, I used my scissors to trim a little of the overhang on the right side, so it would be able to fit into an envelope.


I hope you like my cards and that maybe I inpired you to pull out some of your papers and stamps that you may not have looked at for a while.

If you make some, tag me.  I'd love to see them!


Happy creating!  


Wednesday, November 10, 2021

Using a OSW to create a TSW set of cards

 Hi everyone!  I wanted to pop in to let you all know I've started creating again.

AND that I just signed back up with CTMH! 


Since I'm back on here, I thought I would share how I used a One Sheet Wonder (OSW) found on Pinterest HERE, and then how I changed it up to a Two Sheet Wonder (TSW), which not only doubles the amount of cards you make, but it turns them from some simple cards, to looking like they are not so simple.  But either way you choose to create them, they are beautiful!


These are the OSW cards I created using the template.


And these are the cards I created using two different coordinating sheets of patterned papers, what I'm calling a Two Sheet Wonder (TSW).


To make it easy, I put both sheets of paper together when cutting the template.


Note:  All products used are retired CTMH.

Sunday, March 14, 2021

Stamp Sets For Sale

 WELCOME TO MY BLOG.

IF YOU ARE LOOKING FOR THE STAMPS I HAVE FOR SALE, YOU CAN FIND THEM BY CLICKING ON THE LINK BELOW:


STAMP SETS FOR SALE


LinkWithin

Blog Widget by LinkWithin